Sugar Wafer Pencil Cookies- Fun & Easy Recipe
Sugar wafer pencil cookies are more than just a sweet treat; they’re a nostalgic journey back to school days, art classes, and a whole lot of creative fun! I absolutely adore making these simple yet utterly charming sugar wafer pencil cookies, and I know you will too. What makes them so special? It’s their effortless beauty and the delightful crunch of the wafer paired with smooth, creamy frosting. They capture the essence of childhood, bringing a smile to faces young and old. These aren’t your average cookies; they’re tiny edible works of art that are perfect for back-to-school parties, teacher appreciation gifts, or just a whimsical afternoon snack. Get ready to add a touch of playful charm to your baking repertoire with these delightful sugar wafer pencil cookies!
Sugar Wafer Pencil Cookies
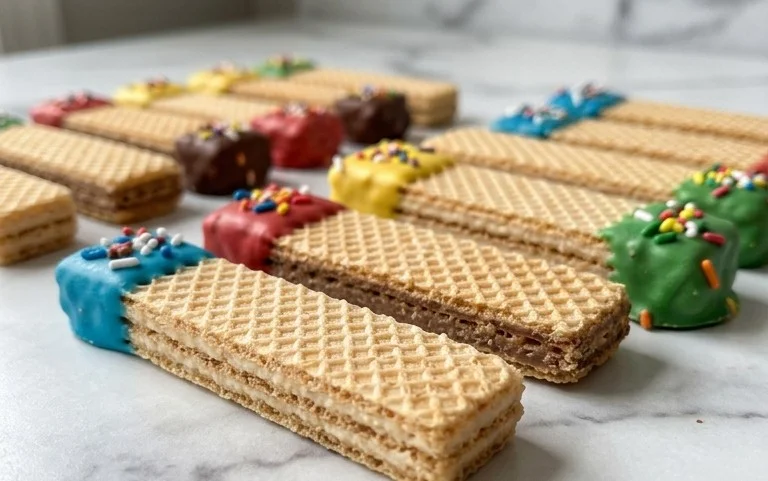
Get ready to add a touch of sweetness and whimsy to your next school event, teacher appreciation gift, or even just a fun afternoon snack! These Sugar Wafer Pencil Cookies are incredibly easy to make and look absolutely charming. They’re perfect for anyone who loves a little creative flair in their baking. Imagine little edible pencils lined up – they’re sure to bring a smile to anyone’s face. This recipe is so straightforward that even beginner bakers can achieve fantastic results. Plus, the taste of crisp sugar wafers dipped in creamy white chocolate is simply delightful.
Ingredients:
Instructions:
Let’s get started on creating these adorable edible pencils!
1. Preparing Your Workstation and Melting the White Chocolate:
Before we begin dipping, it’s a good idea to set up your workspace. Line a baking sheet with parchment paper or wax paper. This will prevent the cookies from sticking as they harden. Now, let’s tackle the white chocolate. Carefully pour the 10-ounce bag of white chocolate melting wafers into a microwave-safe bowl. Microwave the wafers in 30-second intervals, stirring well after each interval. It’s crucial to stir thoroughly to ensure even melting and to prevent scorching. You want the chocolate to be completely smooth and fluid. Once it’s melted, set it aside to cool slightly. If it’s too hot, it might melt the sugar wafers too much, and we want them to maintain their shape.
2. Coloring the “Lead” and “Eraser”:
This is where our pencils start to get their personality! Take a small amount of the melted white chocolate (about 2 tablespoons) and place it into a separate, small microwave-safe bowl. Add just a tiny drop of the red gel food coloring to this smaller portion. Gel coloring is concentrated, so a little goes a long way. Stir this red chocolate very well until the color is uniform and vibrant. You’re aiming for a lovely pinkish-red hue, like the end of a well-loved pencil. If you want a deeper shade, add another tiny drop and stir again. Be cautious not to add too much coloring, as it can affect the texture of the chocolate. You’ll use this colored chocolate for the “eraser” part of your pencils. For the “lead,” we’ll be using the mini chocolate chips, which are conveniently already the perfect color and size.
3. Dipping the Sugar Wafers:
Now for the fun part – transforming our sugar wafers into pencils! Take one sugar wafer cookie. Dip approximately the top quarter of the wafer into the slightly cooled melted white chocolate. You can use a spoon to help coat the chocolate evenly, or gently swirl the wafer in the bowl. Let any excess chocolate drip back into the bowl. Carefully place the dipped wafer onto your prepared parchment-lined baking sheet. Repeat this process with all 20 sugar wafer cookies, ensuring that you’re consistent with how much of the cookie you’re dipping. This dipped end will become the “eraser” end of our pencil.
4. Adding the “Eraser” Detail and “Lead”:
While the white chocolate is still wet, it’s time to add the finishing touches to our pencil erasers! Take your small bowl of red-colored white chocolate. Using a spoon or a small offset spatula, carefully add a small amount of the red chocolate to the very tip of the dipped white chocolate section on each sugar wafer. This will create the distinct colored eraser look. Don’t worry if it’s not perfectly neat; a slightly rustic look is part of the charm! Immediately after adding the red chocolate, take one mini chocolate chip and gently press it into the red chocolate tip. This mini chocolate chip will represent the metal band that holds the eraser onto a pencil.
5. Completing the Pencil and Allowing Them to Set:
Now, let’s create the “lead” end of our pencils. Take another sugar wafer cookie. Dip the opposite end of the cookie (the end that does not have the white chocolate or red chocolate on it) into the plain melted white chocolate. Again, dip about a quarter of the wafer and let excess chocolate drip off. Place this cookie back onto the parchment-lined baking sheet, ensuring it doesn’t touch any other cookies. For the “lead” effect, we’ll gently dip just the very tip of this plain white chocolate-dipped end into the remaining red-colored white chocolate. This creates the pointed tip of the pencil. Once all your cookies are decorated, place the baking sheet in the refrigerator for about 15-20 minutes, or until the chocolate has completely hardened. This will help them set firm and make them easier to handle.
Once they’re set, your Sugar Wafer Pencil Cookies are ready to be admired and enjoyed! They’re a delightful treat that’s sure to impress.
Conclusion:
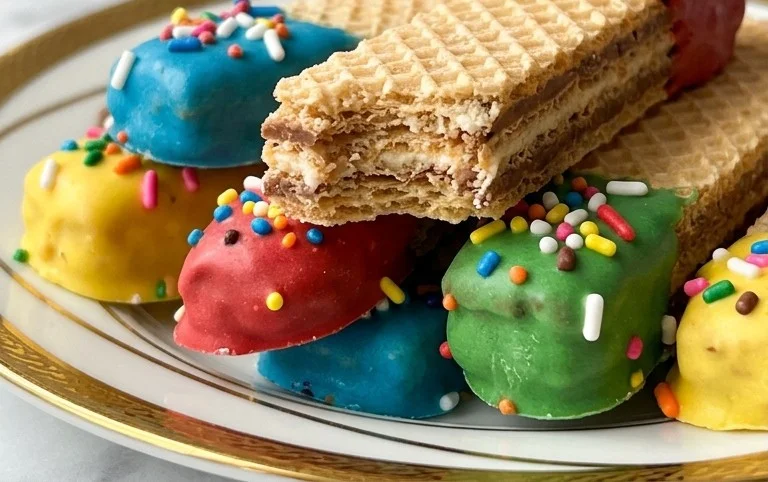
I hope you’ve enjoyed learning how to create these delightful Sugar Wafer Pencil Cookies! This recipe is truly fantastic because it offers a charming and surprisingly simple way to craft edible art that’s perfect for any occasion, especially back-to-school events or as a unique gift. The beauty of these cookies lies in their adaptability – the basic sugar wafer base is incredibly forgiving, and the decorative elements are where your creativity can truly shine. They’re not just visually appealing; the crisp wafer combined with the sweet icing makes for a wonderfully satisfying treat that kids and adults alike will adore. I encourage you to give this recipe a try; you might be surprised at how easy and rewarding it is!
For serving, these Sugar Wafer Pencil Cookies are excellent on their own as a special snack or can be presented beautifully on a platter for parties. They also make a thoughtful addition to a teacher’s gift basket or a student’s lunchbox. Don’t be afraid to experiment with different icing colors and “lead” designs to match specific school subjects or holidays.
Frequently Asked Questions:
Can I make these cookies ahead of time?
Yes, absolutely! Once the icing is completely dry, you can store your Sugar Wafer Pencil Cookies in an airtight container at room temperature for up to a week. This makes them perfect for preparing in advance for parties or events.
What kind of icing works best?
A simple royal icing is ideal for this recipe. It dries hard and smooth, which is perfect for creating those sharp pencil lines and vibrant colors. You can easily make it with powdered sugar, meringue powder (or egg whites), and a little water or milk. Gel food coloring works best for achieving bright, opaque colors.
Sugar Wafer Pencil Cookies
A fun and easy recipe for creating edible pencil cookies using sugar wafers and white chocolate.
Ingredients
-
20 sugar wafer cookies
-
10-ounce bag white chocolate melting wafers
-
red gel food coloring
-
20 mini chocolate chips
-
1/4 cup powdered sugar
-
1 tablespoon milk
Instructions
-
Step 1
Melt the white chocolate melting wafers according to package directions. Be careful not to overheat. -
Step 2
Divide the melted white chocolate into two bowls. Leave one bowl plain white. In the other bowl, add a few drops of red gel food coloring and stir until evenly colored to create the ‘lead’ of the pencil. -
Step 3
Dip one end of each sugar wafer cookie into the red-colored white chocolate, about one-third of the way up. Place on parchment paper to set slightly. -
Step 4
Once the red chocolate has started to firm up, dip the other end of the sugar wafer into the plain white chocolate, creating the ‘eraser’ end. Reconnect with the red portion. -
Step 5
While the white chocolate is still wet, place a mini chocolate chip at the very tip of the red portion to resemble the pencil lead. -
Step 6
In a small bowl, whisk together the powdered sugar and milk until smooth and pipeable. This creates a simple ‘paint’ for the pencil. -
Step 7
Using a toothpick or a piping bag with a small tip, paint thin lines around the white chocolate ‘eraser’ and a thin line at the base of the red chocolate ‘lead’ to mimic the wood of the pencil. Let all chocolate harden completely.
Important Information
Nutrition Facts (Per Serving)
It is important to consider this information as approximate and not to use it as definitive health advice.
Allergy Information
Please check ingredients for potential allergens and consult a health professional if in doubt.