Easy Chocolate Peanut Butter No Bake Cookies
Chocolate peanut butter no bake cookies are an absolute revelation when that sweet craving hits! Forget the oven, the stovetop, and the fuss; this is the ultimate shortcut to pure, unadulterated bliss. There’s something undeniably magical about the perfect marriage of rich, decadent chocolate and creamy, salty peanut butter, and when it comes together in a no-bake cookie, it’s truly something special. These little bites are beloved for their simplicity and their incredibly satisfying texture – a delightful chewiness that’s both comforting and addictive. They’re the perfect treat for a busy afternoon, an impromptu get-together, or just when you need a little pick-me-up without the commitment of baking. Get ready to discover your new go-to recipe for chocolate peanut butter no bake cookies that will have everyone asking for the secret!
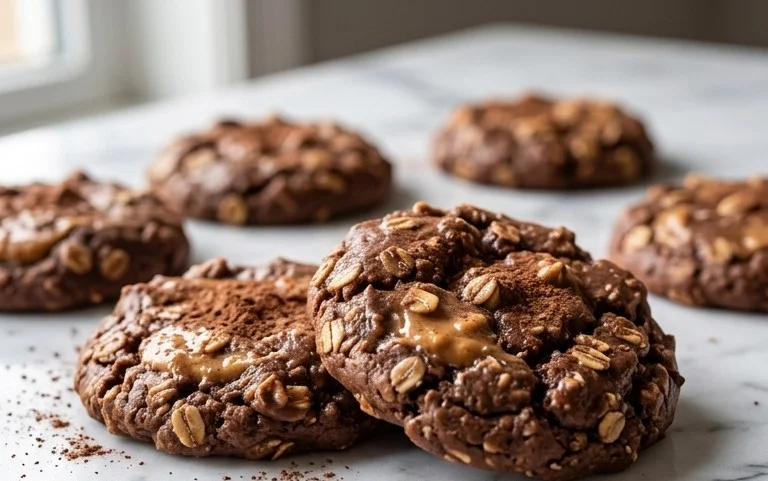
Chocolate Peanut Butter No Bake Cookie Recipe
Are you craving a decadent, chocolatey, peanut buttery treat that requires absolutely zero oven time? Then you’ve come to the right place! These Chocolate Peanut Butter No-Bake Cookies are a timeless classic for a reason. They’re incredibly easy to whip up, satisfyingly chewy, and deliver that perfect combination of rich chocolate and creamy peanut butter that we all love. Whether you’re a seasoned baker or a complete novice, this recipe is foolproof and guaranteed to become a family favorite. Perfect for a quick dessert, a school lunchbox treat, or just because you deserve something sweet, these cookies are a lifesaver when the urge strikes. Get ready to impress yourself and everyone around you with this wonderfully simple yet incredibly delicious recipe.
Ingredients:
- 3 cups quick cook oats
- ¼ teaspoon salt
- ½ cup butter, (unsalted)
- 1 ⅔ cups sugar
- ½ cup milk
- ¼ cup cocoa powder
- 1 cup peanut butter
- 2 teaspoons vanilla extract
Instructions:
Let’s get started on these delightful no-bake cookies! The beauty of this recipe is its simplicity, making it an excellent choice for a quick baking session. We’ll be working on the stovetop for the initial stages, and then it’s all about letting them set.
Phase 1: Creating the Chocolatey Base
First things first, gather all your ingredients and have them measured out. This will make the process so much smoother. In a medium-sized bowl, combine your 3 cups of quick cook oats and the ¼ teaspoon of salt. Give them a little stir to ensure the salt is evenly distributed. Set this bowl aside for now; the oats will absorb all the wonderful flavors we’re about to create.
Now, find yourself a medium saucepan. Add the ½ cup of unsalted butter, 1 ⅔ cups of sugar, and ½ cup of milk to the saucepan. Place this saucepan over medium heat. Stir the mixture constantly until the butter is completely melted and the sugar has dissolved. This is a crucial step; you want a smooth, uniform liquid. Continue to cook this mixture, stirring frequently, for about 1 to 2 minutes after it comes to a gentle boil. You’re looking for a consistent boil that you can’t stir out easily. This process helps to slightly caramelize the sugar and create that perfect chewy texture in the finished cookie. Be careful not to let it boil too vigorously or for too long, as this could result in a harder cookie than desired.
Once you’ve reached the correct boiling point and cooked for the specified time, remove the saucepan from the heat immediately. Now it’s time to introduce the rich chocolate flavor. Add the ¼ cup of cocoa powder to the hot mixture in the saucepan. Stir vigorously until the cocoa powder is completely incorporated and there are no dry lumps remaining. The mixture should turn a deep, glossy brown. This is where the magic starts to happen!
Phase 2: Infusing the Peanut Butter Goodness
With the chocolate mixture still warm and off the heat, it’s time to add the star of the show: peanut butter! Add the 1 cup of peanut butter to the saucepan. Stir everything together until the peanut butter is completely melted and smoothly blended into the chocolate mixture. You want a luscious, uniform consistency. If your peanut butter is very stiff, you might need to stir a little more vigorously, but it should melt into the warm liquid easily.
Next, stir in the 2 teaspoons of vanilla extract. The vanilla adds another layer of warmth and depth to the overall flavor profile, complementing both the chocolate and peanut butter beautifully. Give it a good stir to ensure it’s evenly distributed.
Phase 3: Bringing it All Together
Now, it’s time to combine our glorious chocolate-peanut butter mixture with the oats. Add the prepared oat and salt mixture from the bowl into the saucepan with the wet ingredients. Stir everything together thoroughly. Make sure every single oat is coated in the delicious chocolatey peanut butter mixture. This might take a minute or two, and you’ll need to be thorough to ensure that the oats absorb the liquid and that the mixture holds together well when forming the cookies. The mixture will be quite thick at this point.
Phase 4: Forming the Cookies
Now for the fun part – forming the cookies! You’ll need parchment paper or wax paper, and a baking sheet or a clean, flat surface. Using two spoons or a cookie scoop, drop rounded spoonfuls of the cookie mixture onto the prepared parchment paper. Aim for about 1 to 1.5-inch diameter cookies. Work quickly, as the mixture will start to set as it cools. If the mixture becomes too stiff to scoop easily, you can gently warm it over very low heat for a few seconds, but be careful not to melt it too much. You want them to be firm enough to hold their shape.
Phase 5: Setting the Stage for Deliciousness
Once you have all your cookies scooped out and on the parchment paper, it’s time for them to do their thing – set and firm up. Leave the cookies at room temperature for about 30 minutes to an hour, or until they are completely firm to the touch. You can also speed up this process by placing them in the refrigerator for about 15-20 minutes. Once they’ve set, they are ready to be enjoyed! Store any leftovers in an airtight container at room temperature for a few days, or in the refrigerator for longer storage. These Chocolate Peanut Butter No-Bake Cookies are a fantastic treat that’s sure to satisfy any sweet craving. Enjoy!
Conclusion:
And there you have it! Our delicious Chocolate Peanut Butter No Bake Cookie Recipe is more than just a sweet treat; it’s a testament to how simple ingredients can create something truly spectacular. The magic of these cookies lies in their effortless preparation and incredibly satisfying flavor combination. The rich, decadent chocolate perfectly complements the creamy, salty peanut butter, all held together in a delightful, chewy bite that requires absolutely no oven time. This makes them an ideal solution for a quick dessert craving, a fun activity with kids, or a crowd-pleasing addition to any gathering. I really encourage you to give this recipe a try – you won’t be disappointed!
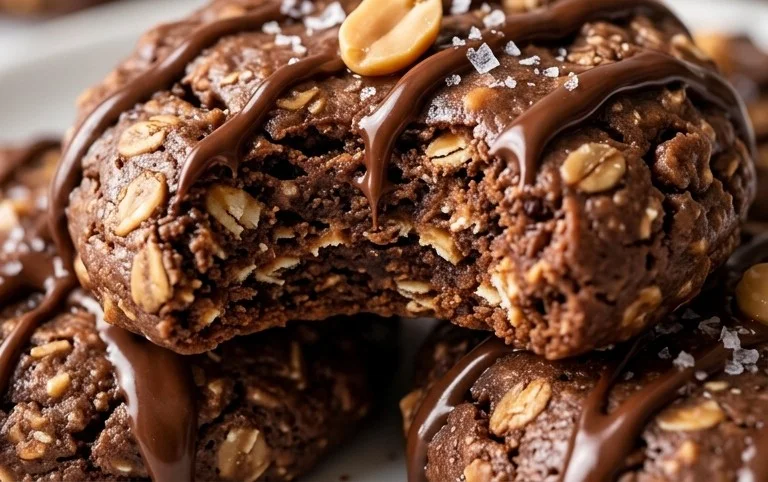
These no-bake wonders are wonderfully versatile. Enjoy them as a standalone snack, pile them high on a dessert platter for parties, or even crumble them over ice cream for an extra layer of flavor and texture. For those who love to experiment, consider adding a sprinkle of sea salt on top for a gourmet touch, or stir in some mini chocolate chips for an even more intense chocolate experience. Perhaps a drizzle of melted white chocolate would add a beautiful contrast! The possibilities are nearly endless with this fantastic Chocolate Peanut Butter No Bake Cookie Recipe.
Frequently Asked Questions:
Can I make these cookies ahead of time?
Absolutely! In fact, they taste even better after they’ve had a little time to set up. You can store them in an airtight container in the refrigerator for up to a week. They might become a little firmer when chilled, but they’ll soften up quickly at room temperature.
What kind of peanut butter works best?
For the best texture and flavor, I recommend using creamy, regular peanut butter (the kind that needs stirring). Natural peanut butters that separate can sometimes affect the texture and might make the cookies too oily. Using a standard peanut butter ensures that classic, smooth cookie consistency we all love.
Can I substitute the type of chocolate chips?
You can certainly experiment! While semi-sweet chocolate chips are classic, feel free to use milk chocolate chips for a sweeter cookie, or dark chocolate chips for a more intense cocoa flavor. White chocolate chips would also be an interesting variation, though they might alter the overall flavor profile significantly. Just remember to use good quality chips for the best results.
Chocolate Peanut Butter No Bake Cookie Recipe
Delicious and easy no-bake cookies combining chocolate and peanut butter with chewy oats.
Ingredients
-
3 cups quick cook oats
-
¼ teaspoon salt
-
½ cup unsalted butter
-
1 ⅔ cups sugar
-
½ cup milk
-
¼ cup cocoa powder
-
1 cup peanut butter
-
2 teaspoons vanilla extract
Instructions
-
Step 1
Line baking sheets with parchment paper. -
Step 2
In a medium saucepan, combine butter, sugar, milk, and cocoa powder. Bring to a rolling boil over medium heat, stirring constantly. -
Step 3
Boil for exactly 1 minute, then remove from heat. -
Step 4
Stir in peanut butter and vanilla extract until smooth. -
Step 5
Add the quick cook oats and salt, stirring until well combined. -
Step 6
Drop rounded tablespoons of the mixture onto the prepared baking sheets. -
Step 7
Let cookies cool completely and set before serving.
Important Information
Nutrition Facts (Per Serving)
It is important to consider this information as approximate and not to use it as definitive health advice.
Allergy Information
Please check ingredients for potential allergens and consult a health professional if in doubt.