Easy Refrigerator Dill Pickles Quick Recipe
How to Make Refrigerator Garlic Dill Pickles are the crunchy, tangy heroes of any sandwich, charcuterie board, or midnight snack attack. There’s just something incredibly satisfying about that perfect pickle bite – the crisp snap, the zesty dill infusion, and that unmistakable garlicky punch. Forget those sad, watery pickles from a jar; we’re talking about elevating your pickle game to a whole new level, right in your own refrigerator! These aren’t your grandma’s canning pickles, though they’re just as delicious. The beauty of refrigerator garlic dill pickles lies in their simplicity and speed. You can have a batch ready to enjoy in just a few days, and the flavor profile is simply irresistible. They are incredibly versatile and add that essential zing to so many dishes.
Why You’ll Love These Refrigerator Garlic Dill Pickles:
Quick & Easy Preparation
Incredibly Fresh Flavor
Perfectly Crunchy Texture
Customizable Garlic & Dill Levels
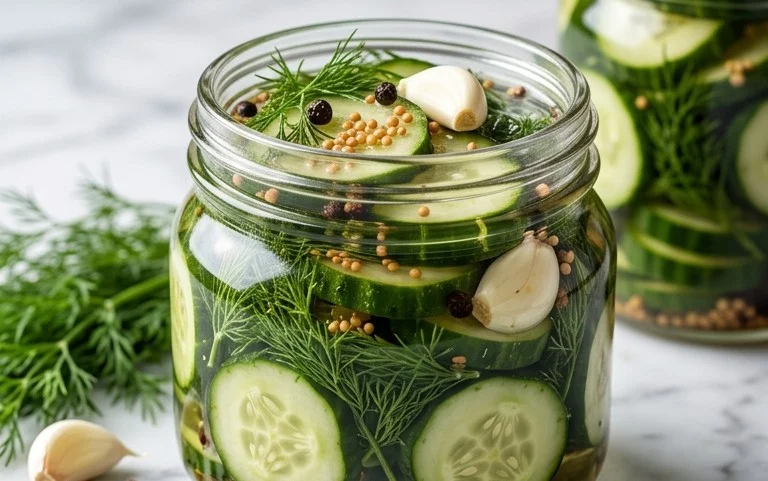
How to Make Refrigerator Garlic Dill Pickles
There’s something incredibly satisfying about a crisp, tangy, homemade pickle. And the best part? You don’t need a complicated canning setup to achieve pickle perfection! Refrigerator dill pickles are wonderfully simple to make and offer that satisfying crunch and burst of flavor whenever you crave it. These are my go-to recipe for quick pickles that live happily in the fridge, ready to elevate sandwiches, burgers, or just be enjoyed straight from the jar. The magic lies in the brine and the fresh ingredients, creating a pickle that’s far superior to anything store-bought. Let’s get started!
Ingredients:
- 2 lbs. kirby or other pickling cucumbers
- 2 cups water (unfiltered untreated water is highly recommended)
- 1 cup 5% white vinegar
- 1 tablespoon pickling salt
- 2 cloves garlic (peeled)
- 4 sprigs fresh dill per jar
- 1 teaspoon black peppercorns (or pickling spice)
- 1/2 teaspoon hot pepper flakes (adjust for personal taste)
Preparing Your Cucumbers
The first step to delicious pickles is selecting the right cucumbers. Kirby cucumbers are ideal because they have a firm texture and thinner skin, which means they absorb the brine beautifully without becoming mushy. If you can’t find kirbys, any firm pickling variety will work well. Wash your cucumbers thoroughly under cold running water. You can either leave them whole if they are small, or if they are larger, you can cut them into spears or slices. For spears, I like to cut them lengthwise into quarters. If you prefer rounds, slice them about 1/4 inch thick. The size and shape will affect how quickly they pickle and how they fit into your jars.
Creating the Perfect Brine
The brine is the heart of any pickle, and for these refrigerator pickles, it’s a simple yet effective combination. In a medium saucepan, combine the 2 cups of water and 1 cup of 5% white vinegar. It’s important to use white vinegar with a 5% acidity for pickling; apple cider vinegar or other types can alter the flavor and pickling process. Add the 1 tablespoon of pickling salt to the saucepan. Pickling salt is crucial because it doesn’t contain anti-caking agents that can make your brine cloudy. Stir the mixture over medium heat, bringing it just to a simmer. You want the salt to be completely dissolved. Once dissolved, remove the saucepan from the heat and let the brine cool slightly while you prepare your jars.
Assembling the Jars
Now for the fun part – packing your jars! You’ll need clean, sterilized jars for this. I prefer using wide-mouth jars, as they make packing the cucumbers much easier. For this recipe, you’ll likely need two pint-sized jars or one quart-sized jar. In the bottom of each jar, place one of the peeled garlic cloves. Then, add 2 sprigs of the fresh dill. The dill will infuse the pickles with its aromatic flavor. Next, add about half of the black peppercorns and half of the hot pepper flakes to each jar. If you’re using a pickling spice blend, add about half a teaspoon to each jar. The hot pepper flakes are optional, but I find they add a lovely subtle warmth that balances the tanginess of the vinegar.
Packing and Brining
Carefully pack your prepared cucumber pieces into the jars. Stuff them in snugly, but don’t mash them. You want to leave a little bit of space at the top of the jar, about half an inch. Once your cucumbers are packed, carefully pour the slightly cooled brine over them, making sure to submerge all the cucumber pieces. It’s important to cover the cucumbers completely with the brine. If for some reason you don’t have enough brine, you can quickly whip up a little more by combining 1/2 cup water, 1/4 cup vinegar, and a pinch more pickling salt. Gently tap the jars on the counter a few times to release any trapped air bubbles.
The Waiting Game (and the Best Part!)
Once your jars are filled with cucumbers and brine, screw on the lids tightly. Place the jars in the refrigerator. That’s it! You don’t need to do any further cooking or processing. The magic happens in the fridge. For the best flavor, I recommend waiting at least 24 to 48 hours before digging into your pickles. The longer they sit, the more the flavors will meld and the cucumbers will become deliciously pickled. I often find they are even better after a week. These refrigerator pickles will keep in the fridge for about 2-3 weeks, so you can enjoy them for a good while.
Enjoy your homemade garlic dill refrigerator pickles! They are fantastic on a burger, chopped into a tuna salad, or just as a healthy, crunchy snack. The brine itself is also fantastic to use in other dishes!
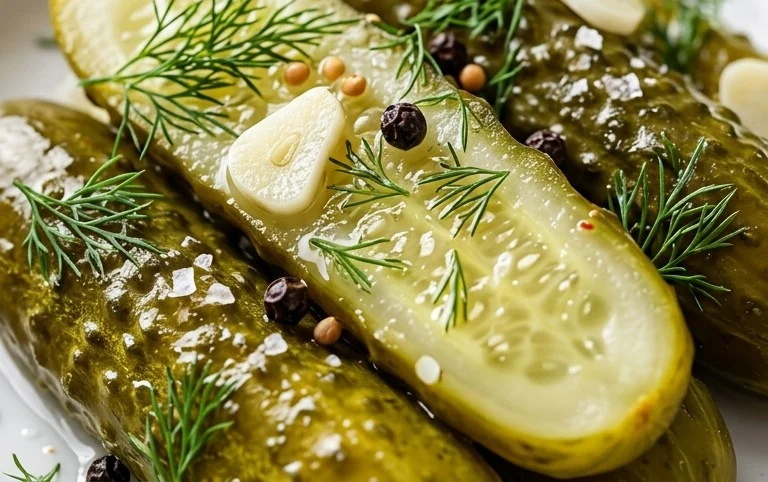
Conclusion:
Congratulations! You’ve just unlocked the secret to making delicious, crisp, and wonderfully tangy refrigerator garlic dill pickles right in your own kitchen. This recipe is fantastic because it’s incredibly simple, requires no special equipment, and delivers a flavor far superior to anything you can buy in a jar. The quick pickling process means you can enjoy these homemade gems in just a few days, and the fresh dill and garlic provide an irresistible aroma and taste. They are the perfect addition to sandwiches, burgers, charcuterie boards, or simply enjoyed straight from the jar as a refreshing snack.
Don’t hesitate to experiment with this base recipe! You can add a pinch of red pepper flakes for a touch of heat, or even try different herbs like fresh dill sprigs or mustard seeds. The possibilities are endless, and the satisfaction of creating your own perfect pickles is immense. Give these refrigerator garlic dill pickles a try – I promise you won’t be disappointed!
Frequently Asked Questions:
Why are my refrigerator garlic dill pickles not crisp?
The crispness of your pickles often depends on the freshness of your cucumbers. Look for firm, unwaxed cucumbers for the best results. Also, ensuring your brine is sufficiently cold and that you’re using good quality vinegar can help maintain that desirable crunch. Avoid over-brining; remember, they are refrigerator pickles and don’t require the intense heat sterilization of shelf-stable pickles.
How long do refrigerator garlic dill pickles last?
When stored properly in an airtight container in the refrigerator, these homemade pickles can last for about 2 to 4 weeks. However, their flavor and texture are often at their peak within the first 1 to 3 weeks, so it’s best to enjoy them relatively soon after they’ve had time to cure.
Can I use different types of cucumbers?
Absolutely! While Kirby cucumbers are a popular choice for their firmness and smaller seed content, you can also experiment with Persian cucumbers or even small English cucumbers. The key is to use cucumbers that are fresh, firm, and relatively small for the best pickle consistency and texture.
Refrigerator Garlic Dill Pickles
Quick and easy homemade refrigerator pickles bursting with garlic and dill flavor. No canning required, just simple pickling for a delicious, crunchy treat.
Ingredients
-
2 lbs. kirby or other pickling cucumbers
-
2 cups water (unfiltered untreated water is highly recommended)
-
1 cup 5% white vinegar
-
1 tablespoon pickling salt
-
2 cloves garlic (peeled)
-
4 sprigs fresh dill per jar
-
1 teaspoon black peppercorns
-
1/2 teaspoon hot pepper flakes
Instructions
-
Step 1
Wash and trim the ends off your pickling cucumbers. You can slice them into rounds, spears, or leave them whole, depending on your preference. -
Step 2
In a saucepan, combine the water, white vinegar, and pickling salt. Heat gently, stirring until the salt is completely dissolved. Remove from heat and let it cool slightly. -
Step 3
While the brine cools, pack your clean jars. Place 2 peeled garlic cloves, 4 sprigs of fresh dill, peppercorns, and hot pepper flakes into each jar. -
Step 4
Tightly pack the prepared cucumbers into the jars, leaving about 1/2 inch of headspace at the top. -
Step 5
Pour the cooled brine over the cucumbers, ensuring they are fully submerged. Remove any air bubbles by gently tapping the sides of the jars or using a clean utensil. -
Step 6
Seal the jars tightly and refrigerate. The pickles will be ready to eat in about 24-48 hours, and the flavor will continue to develop over time.
Important Information
Nutrition Facts (Per Serving)
It is important to consider this information as approximate and not to use it as definitive health advice.
Allergy Information
Please check ingredients for potential allergens and consult a health professional if in doubt.